Showing posts with label candy. Show all posts

Tuesday, October 4, 2011

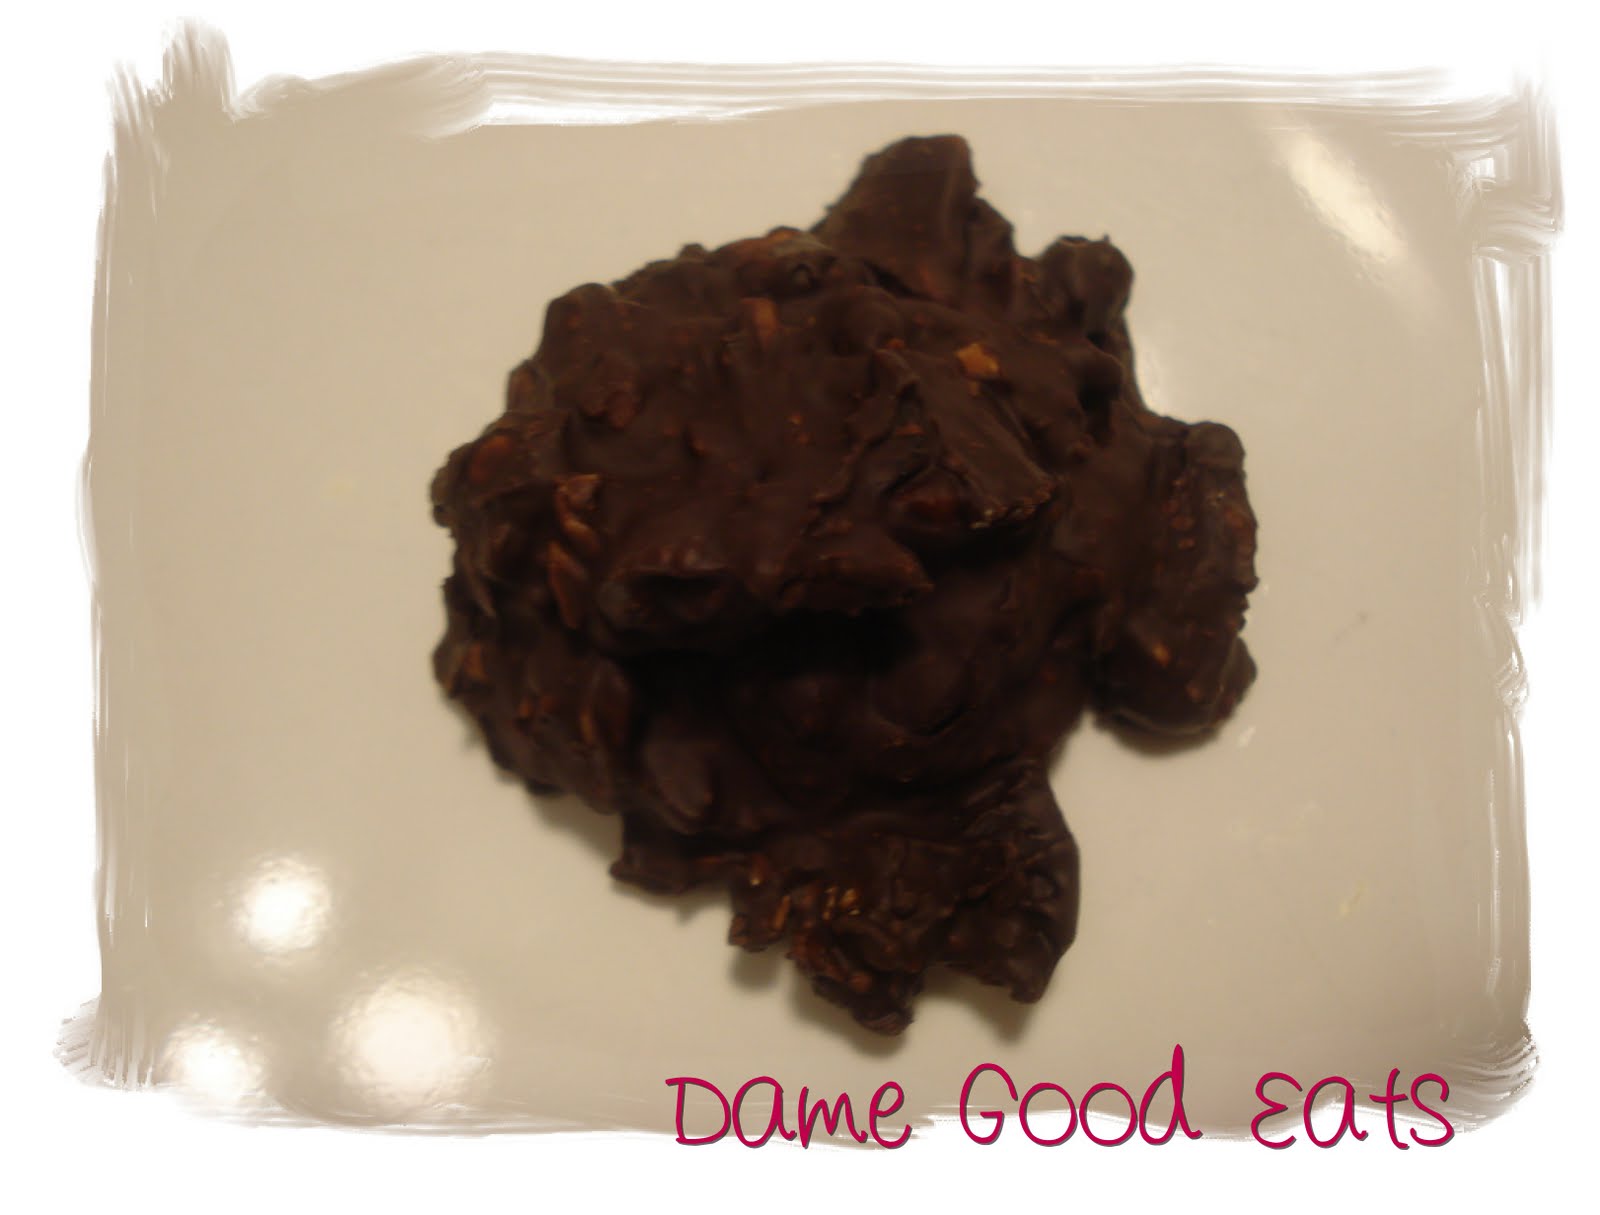
Cherry Almond Dark Chocolate Clusters


I turn 24 in 5 days.

I can't say I am particularly excited about it. 24 doesn't seem all that eventful, and I kind of like the number 23...and 24 is really close to 25 which is 5 years away from 30...

Gross.


Yeah, these next 5 days can go slow if they want.

I'm cool with that.

I am looking forward to spending time with my friends and family watching some sketch comedy and enjoying a night of dancing and girlie drinks...I'm okay with that...but that's about it.

I made these little treats when I didn't feel like baking...and knew I would indeed devour more chocolate than I needed so I wanted something "light"-ish.

These are good if you're trying to get a quick and somewhat guiltless sweets fix...but they aren't a no-bake cookie thats for sure...

Mmm...no-bakes...maybe I'll make an entire batch of those for myself for my birthday.

Yep, done.


Cherry Almond Dark Chocolate Clusters
From foodnetwork.com

Ingredients:

1 cup toasted almonds, coarsely chopped
1/2 cup dried cherries, coarsely chopped
6 ounces dark chocolate, finely chopped

Directions:

In a medium bowl, toss together the almonds and the cherries. Line a baking sheet with waxed paper.

Melt half the chocolate in the top of a double boiler over slightly simmering water, over the lowest possible heat, stirring frequently. Make sure the water is not touching the top pan. Remove the double boiler from the heat and stir in the rest of the chocolate. Remove the top pan with the chocolate in it, gently wipe the bottom of it and set it aside for a moment. Replace the simmering water in the bottom pan with warm tap water. Put the pan of melted chocolate on top of the warm water. This will keep the chocolate at the right temperature while you make the clusters.

Stir the fruit-nut mixture into the chocolate. Spoon out heaping tablespoon-sized clusters of the chocolate mixture onto the baking sheet about 1-inch apart. Put them in the refrigerator to set for 15 minutes. Store and serve at room temperature.

Saturday, May 7, 2011

Cookie Dough Truffles


A few posts back I was talking about what I wanted to be when I grew up as a kid...it got me thinking about how thse aspirations progressed throughout my life...

My dreams and aspirations after the multiple face plants were a bit more realistic. For a while I wanted to be a writer. I loved to write. I used to enter poetry contests and even made it to the finals in a "Power of the Pen" writing competition. I was set on writing a book one day but I could never get past the first paragraph. Patience...crap...should probably have some of that huh?

Well I still love writing but I am sad that I had somewhat lost that drive I had. This blog definitely brings me back to that place and helps me to find that drive again.

In High School I did theater. I fell in love. I loved everything about it. I loved the adrenaline rush that surged through my body everytime I hit the stage, the stage makeup, and the cast parties...oh the cast parties. This is where I met many of my best friends who I still consider my besties today. I'm too much of a homebody to be an actress. Nor am I one to sell my body and constantly be in the eye of public scrutiny...give up all the food I love? I don't think so.

In college I majored in Psychology and Communications quite sure I wanted to be a marriage and family counselor. Then I volunteered at the suicide hotline for a year. It was a very rewarding experience though it was tough...really tough. I soon realized it wasn't for me. For about a whole minute I thought I wanted to do PR...again, nope!

Then one magical day I took a sign language class and from then on I knew I found something I was actually passionate about (aside from cooking and eating). Being born hard of hearing I had always had an interest in deaf culture but it had never occured to me that I could be a part of it...

As a kid I would pretend I knew sign language to impress the other kids...whoops. Well a year from now I hope to be an ASL interpreter. I still have quite a ways to go and really need about 37929387 more hours worth of practice...but at least I know that I will love...absolutely love what I will be doing.

Wanna know something else I am absolutely in love with? Cookie dough...I have proclaimed this devotion to cookie dough at least 6 times but thats just how crazy in love I am. I stumbled across these cookie dough truffles and had drooled over them ever since until I finally had an excuse to make them. Thank God people have birthdays...or I would have a serious heart condition about now...

Cookie Dough Truffles
Adapted from Tasteofhome.com


Ingredients:

1/2 cup butter, softened
3/4 cup packed brown sugar
1 teaspoon vanilla extract
2 cups all-purpose flour
1 can (14 ounces) fat-free sweetened condensed milk
1/2 cup miniature semisweet chocolate chips
1-1/2 pounds dark chocolate candy coating, coarsely chopped

Directions:

In a large bowl, cream the butter and brown sugar until light and fluffy. Beat in vanilla. Gradually add flour, alternately with milk, beating well after each addition. Stir in the chocolate chips and walnuts. Shape into 1-in. balls; place on waxed paper-lined baking sheets. Loosely cover and refrigerate for 1-2 hours or until firm.

In a microwave bowl, melt candy coating; stir until smooth. Dip balls in coating; allow excess to drip off; Place on waxed paper-lined baking sheets. Refrigerate until firm, about 15 minutes. If desired, remelt remaining candy coating and drizzle over candies. Store in the refrigerator. Yield: 5-1/2 dozen.


Share/Bookmark

Sunday, March 6, 2011

Blog Birthday! Funfetti Cake Balls


Today is my blogs birthday! One year ago today I reluctantly started this blog looking for a creative outlet for all my crazy baking and cooking shenanagans (thats the best I can do with the spelling of that). I may not have 698+ blog followers and fancy pictures like many of the great blogs out there but I am still pretty darned proud of this thing and very thankful for the 108 of you that do follow...it makes me :) lots!

In the future, I am really really really hoping to get a nice camera. Sure I still wont really have the extensive knowledge on food photography and proper lighting but a reliable camera that actually works would be a great start!

Here's to another year of doing something that really makes me happy...getting fat and telling people how I did it ;)

I actually made these cake balls on thursday for a girl I had become friends with in the interpreting program. She definitely deserved something for her birthday so I stayed up all night doing these...trust me, this is a big deal with how impatient I am.

I thought these were the perfect little gifts to post on my blogs birthday...funfetti is my favorite favorite favorite! I know most cake ball recipes out there have you using one box of cake and one can of frosting. Funfetti is one of the few boxed cake I say "go for it" for, but that frosting? Blegh! Hate it...

So I made a frosting from scratch and played around with it and made cake balls a little different from your average cake balls...and thse are oh so good!

Funfetti Cake Balls
Dame Good

Ingredients:

1 (18.9 oz) box funfetti cake mix
1/3 cup vegetable oil
1 cup water
3 eggs
1/2 cup unsalted butter, softened
4 cups powdered sugar
2 tablespoons milk
2 teaspoons vanilla
32 ounces white chocolate
non-pariels (sprinkles)

Directions:

Follow directions on box to bake cake in a 9x13 in cake pan. Allow cake to cool for 10 minutes after baking. Crumble cake into a large mixing bowl.

Cream 1/2 cup butter in the bowl of an electric mixer. Add 1 teaspoon of vanilla exract. Slowly add the powdered sugar until incorporated. Add another teaspoon of vanilla. Add the milk and whip frosting for about a minute.

Mix the frosting with the cake until fully mixed. Put the mixture in the freezer for about 30 minutes.

Using a cookie scoop, scoop 1-1 1/2 inch balls of cake. Roll into the shape of balls and place on a baking sheet lined with wax paper. When all the balls are rolled out, place the baking sheet in the freezer for about 30 minutes.

While the balls are cooling, melt the white chocolate in a double broiler over medium heat or in a microwave-safe bowl for about 1 min 30 seconds, stirring every 30 seconds.

Transfer the baking sheet to the refrigerator and work on a few balls at a time. Using a toothpick and a spoon, dip the cake ball into the melted chocolate, using the spoon to spoon chocolate over any uncovered parts of the ball. Once the ball is covered, remove the ball from the chocolate and tap any excess chocolate off the ball with the spoon. Place ball on a baking sheet lined with waxing paper by letting the ball slide off the toothpick...smooth the hole over with the spoon and sprinkle the top of the ball with non-pariels. Repeat until all balls are covered.

Store balls in an airtight container in the refrigerator (for several days), or zip lock bag in the freezer (for a couple weeks). Enjoy!

Ps. You can also attatch popsicle sticks to the balls and make cake-pops for a fun gift :)


Share/Bookmark

Tuesday, February 8, 2011

Peanut Pretzel Bark


Does anyone remember when I went through that bark craze (which I put on hold until my waistline shrinks some more)? Well this stuff is to blame. I made this over the holidays and was so amazed with how awesome it was that I ate maybe half of the pan...true story.

Part of what amazed me was the fact that I found white chocolate to be delicious. Ever since I was a little tot, I have shuttered at the thought of white chocolate. I think everyone has one of these experiences with some type of food. I remember one easter I ate a giant white chocolate bunny...

Which ended up all over the place. My stomache did not agree with the bunny if you catch my drift. Since then, I have not been fond of chocolate bunnies, particularly white chocolate ones. Blegh, I can taste that bunny now.

Anyway, I decided to give white chocolate another chance. I like to give the benefit of a doubt. Plus, I really really loved the idea of peanuts and pretzels and chocolate. Sure it would be awesome with milk or dark chocolate but the white was more "holiday-y" to me.

I am so fricking glad I decided to forgive white chocolate because this was amazing. I LOVED it and will most likely be making it every holiday to come. Gosh I want some now...:/

Peanut Pretzel Bark
From foodnetwork.com

Ingredients:

18 (1-ounce) squares white chocolate
3 cups skinny pretzel sticks, broken into small pieces but not crushed, then measured
2 cups dry salted peanuts

Directions:

Line a rimmed cookie sheet with parchment or waxed paper.

Melt the chocolate in a double boiler over simmering water until smooth, or melt in the microwave in a 2 quart glass dish. Microwave on high (100 percent) for 1 minute, stir, and microwave on high for 1 minute more. If necessary, microwave on high for 10 seconds more, and stir until the chocolate is melted and smooth. Stir in the pretzel pieces and peanuts. Stir well with a flexible spatula.

Spoon onto the prepared cookie sheet, spreading the mixture out so that ingredients are relatively evenly distributed.

Allow for the chocolate to cool for several hours or refrigerate for about 45 minutes, until firm. Break the bark into irregular pieces, like peanut brittle. Store in cookie tins, or package in Chinese food take-out cartons lined with waxed paper.
Share/Bookmark

Tuesday, February 1, 2011

Buckeyes


Here in Ohio we have something that is totally amazingly wonderfully awesome. I don't know who came up with these but its genious and one of the things that I'm proud to claim as "Ohio's" and that is buckeyes. Not only does this include the Ohio State football team but the peanut butter chocolate candy...they are easily one of my favorite things ever.

I know football season has quickly passed before I had a chance to post this recipe but the Buckeyes ARE #1 in Basketball right now so I still deem it appropriate to show my pride and love of all things Buckeye. I make these any chance I get and anytime I go up to Minnesota to visit family because they are always requested.

If you haven't heard of or tried these...you haven't lived...get on it ASAP!

Buckeyes
Adapted from Allrecipes.com

Ingredients:

1 1/2 cups creamy peanut butter
1/2 cup butter, softened
1 teaspoon vanilla extract
1/2 teaspoon salt
3 cups powdered sugar, or as needed
1 (12 ounce) package semi-sweet chocolate chips
2 tablespoons Shortening

Directions:

Combine peanut butter, butter, vanilla and salt in large bowl. Beat with an electric mixer on LOW until blended. Add 2 cups powdered sugar, beating until blended. Beat in additional powdered sugar until mixture, when shaped into a ball, will stay on a toothpick. Shape into 1-inch balls. Refrigerate.

Place chocolate chips and shortening in microwave-safe bowl. Microwave on MEDIUM for 30 seconds. Stir. Repeat until mixture is smooth. Reheat as needed while coating peanut butter balls.

Insert toothpick in peanut butter ball. Dip 3/4 of ball into chocolate, leaving top uncovered to resemble a buckeye. Remove excess. Place on wax paper-lined tray. Smooth over holes with finger or butter knife. Refrigerate until firm.

Share/Bookmark

Wednesday, January 5, 2011

Funfetti Bark


Yep, I'm still on a bark craze. Well actually I made this when I made the Cupcake Bark because I wanted to play around with the idea. Not only am I now obsessed with bark but I have always been obsessed with cake batter. Yep, I'm a bowl licker. Many times I prefer the batter over the baked good...and I am well aware that that sounds just a tad bit crazy but I'll accept that.

Cake batter ice cream also happens to be my faaaavorite ice cream. Give me a pint of Edy's Light Take the Cake Ice Cream and call it a day. And...believe it or not...funfetti cake is my alltime favorite cake. Yeah, I realize it comes out of a box and I'm not a fan of using a boxed cake. I did find a pretty good homemade funfetti recipe that does the trick but every now and then...a girl needs a box of funfetti.

Yeah, this is what I call funfetti bark...proceed to drool.

Funfetti Bark
Dame Good

Ingredients:

3 cups white chocolate chips
3 tablespoons funfetti cake mix (dry)
sprinkles (nonpariels)

Directions:

Melt 3 cups of white chocolate in the microwave for 45 seconds at a time, stirring each time. It will take about 2-4 minutes. Once the chocolate is completely melted, stir in 3 tablespoons of the cake mix. When that is completely mixed in, stir in desired amount of sprinkles. Pour the chocolate on a baking sheet lined with wax paper. Top the bark with additional sprinkles. Put the chocolate in the fridge until it hardens, about 30-45 minutes. Once cool, break into uneven shards and store in airtight containers. Enjoy!

Share/Bookmark

Sunday, January 2, 2011

Cupcake Bark


So far my 2011 has been a decent year :) I hope everyone had a safe and happy new year! I'm not typically one to make new years resolutions. I try to set goals for myself year round but this year there is one thing I want to do and that is make more time for my girlfriends. I miss them all the time since I graduated but I am so exhausted from school and work that by the time I get home, I just want to lay on the couch and do nothing. The fact that I tend to be quite lazy probably doesn't help either. With Shawn only being in town a very limited amount of days (mostly only on the weekends), its gotten hard to prioritize my time with my friends. So this year, I am going to improve on this and give them the effort they deserve. I don't want them to think I take them for granted or that they are not a priority in my life because they are...those girls mean the world to me...

Anyhoo....

I rang in the new year with pork and sauerkraut. My family always did the sauerkraut on new years. It's a German tradition that is supposed to bring good luck. Because pork is a fat pig, it is supposed to symbolize an abundant year ahead and sauerkraut is made with cabbage and the green in cabbage symbolizes wealth and money. I went over to Shawns and his roomates and I filled 2 large crockpots with our "good luck" and had a nice hungover feast. Crossing my fingers!

So I think my first blog post of the year should be kind of epic. That's how I feel about this bark. Bark is fun because you can throw whatever you want into melted chocolate and hope for the best. I've been on a abit of a bark craze for the holidays so I was inspired to say the least...

I had a couple of boxed cake mix in my pantry that my dad had sent me and they have been sitting there collecting dust because I prefer to bake from scratch. I absolutely cannot waste any food so I decided to play with them and see what I can do with cake mix other than cupcakes. I made cake mix cookies sandwiches and a couple kinds of bark...

This first one is what I call a "cupcake" bark because I made it in 2 layers. The first layer has yellow cake mix and is colored yellow and the top layer is colored pink to resemble frosting and is topped with sprinkles. This would make a great little diy birthday gift because it's so cute!

Cupcake Bark
Dame Good

Ingredients:

4 1/2 cups white chocolate chips
3 tablespoons yellow cake mix (dry)
yellow food coloring (use an oil-based coloring, a water base will shock the chocolate, or use colored melting chocolate)
pink food coloring (use an oil-based coloring, a water base will shock the chocolate, or use colored melting chocolate)
sprinkles

Directions:

Melt 3 cups of white chocolate in the microwave for 45 seconds at a time, stirring each time. It will take about 2-4 minutes. Once the chocolate is completely melted, stir in 3 tablespoons of the cake mix. When that is completely mixed in, stir in desired amount of yellow food coloring. Try not to add too much, you just want a light yellow. Pour the chocolate on a baking sheet lined with wax paper. Put the chocolate in the fridge until it hardens, about 30-45 minutes.

While the first layer is cooling, melt the remainging 1 1/2 cups of chocolate in the microwave. When it is completely melted, stir in desired amount of pink food coloring. Pour pink layer over the yellow layer and top the pink layer with sprinkles. Put the bark in the refrigerator until cool. Once cool, break into uneven shards and store in airtight containers. Enjoy!

Share/Bookmark

Monday, December 20, 2010

Homemade Reeses


As I said in my last post, Saturday was Shawn and I's 1 year anniversary and I made him the candies that he got me a year ago. I made ginormous Whatchamacallits and Reese trees. Whenenver there is a special occasion or a birthday, we normally throw one of each in along with our gift. It's a little weird but thats how we role. I used leftover ingredients to make Whatchamacallit bites and mini reese cups.

He got us tickets to go to the Funny Bone, which I am estatic about! I had mentioned before how I really love comedy clubs and want to go see stand-up with him. He actually listened and got me a really thoughtful gift for our anniversary. We are going January 2nd and I can't wait! You have to go on special/fun/different dates when you are in a relationship to hold on to the excitement and avoid getting to comfortable and into a routine. See? This is that effort thing I was talking about :) He makes me sigh...

Homemade Reese Trees and Reese Cups
Adapted from Allrecipes.com

Ingredients:

3/4 cup creamy peanut butter
1/4 cup butter, softened
1/2 teaspoon vanilla extract
1/4 teaspoon salt
1-1/2 cups powdered sugar, or as needed
1-2 tablespoons heavy cream
1 (12 ounce) package semi-sweet chocolate chips
1 tablespoon All-Vegetable Shortening
1 (12 oz) bag semi-sweet chocolate chips

Directions:

Combine peanut butter, butter, vanilla and salt in large bowl. Beat with an electric mixer on LOW until blended. Add 2 cups powdered sugar, beating until blended. Add cream until desired creaminess is reached. It shouldn't be sticky. If you are making trees, refrigerate dough for 10 minutes. When cool and firm, roll out to desired thickness and cut out trees using a tree cookie cutter. Then, refrigerate the trees for about 10-15 minutes again to firm up the peanut butter.

Place chocolate chips and shortening in microwave-safe bowl. Microwave on MEDIUM for 30 seconds. Stir. Repeat until mixture is smooth. Reheat as needed while coating peanut butter.

To make trees, cover one side in chocolate, refrigerate until firm. Then repeat the process on the opposite side. To make reese cups, put mini cupcake liners in a mini muffin pan. Fill up each liner with chocolate about 1/4 of the way up. Then shape peanut butter into small balls (size them about the same size around as the tip of your index finger). Flatten the top a little bit and place on the chocolate already poured in the liners. Cover the peanut butter with chocolate completely until no longer visible. Refrigerate until firm.

Enjoy!
Share/Bookmark

Sunday, December 19, 2010

Homemade Whatchamacallits


Yesterday was Shawn and I's one year anniversary :). With it being so close to Christmas, it was hard to think of what to get him. I am poor and stumped enough when it comes to getting Christmas gifts. I then remembered that the day we became an "official" couple he brought me a Christmas present. In a pretty shiny Victorias Secret bag was a Victorias Secret gift card, Reese trees and king-size Whatchamacallits. I had never had a Whatchamacallit, but being that I am obsessed with peanut butter and chocolate, Shawn insisted I try one. Yeah, they rocked. Between the two of us we ate like 64789 calories worth of candy that night.

I thought it might be a cute/fun idea to try to homemake Whatchamacallits and Reese trees for him. I figured it was a little personal thing I could do that was special to us. It took me forever but I finally put something together that I thought was the closest homemade take on a Whatchamacallit. The recipe made a ton, so I think he was quite overwhelmed when I handed over the 10 lbs worth of homemade candy after a big meal at a fancy restaraunt in German Village. Our meal was finished off with a creme brule trio, so I think sweets was the last thing on his mind. Oops!

1 year ago
Today (well yesterday) :)

This is so cheesy and I know it but this past year has been amazing. I graduated college, I got my pug that I have wanted for as long as I can remember, I got my own apartment in a neighborhood I am absolutely in love with, I got a job at a cupcake bakery and I got to spend it with a man whose existence is beyond my wildest dreams. Seriously, he is everything I could ever ask for and more. With him being away and traveling all the time for work it is hard. But because of that we don't take the time we have for granted and we spend quality time together rather than worrying about the quantity of time. Our relationship needs a lot of effort because of the distance and he actually puts in that effort. I have never had this before; what I have with him. I am the luckiest girl :) really.

Okay that's enough cheese. Candy anyone?

Homemade Whatchamacallits
Dame Good adapted from Allrecipes.com/Peanut_Butter_Treats and Allrecipes.com/Chewy_Caramel

Ingredients:

For peanut butter treats:
3 tablespoons butter or margarine
1 (10 ounce) package regular marshmallows
1/2 cup peanut butter
6 cups Crisp Rice cereal

For the caramel:
1/2 cup butter or margarine
1/2 pound (1 cup) light brown sugar
1/2 (14 ounce) can sweetened condensed milk
1/2 cup light corn syrup
1/2 pinch salt
3/4 teaspoon vanilla extract

For the chocolate:
2 12oz bag (about 3 cups) milk chocolate chips
1/2 tablespoon shortening

Directions:

In large saucepan melt butter over low heat. Add marshmallows and stir until completely melted. Remove from heat. Stir in peanut butter until melted.

Add Crisp Rice cereal. Stir until well coated.

Using buttered spatula or wax paper evenly press mixture into 13 x 9 x 2-inch pan coated with cooking spray. Cool.

In a heavy bottomed saucepan over medium heat, combine the butter, brown sugar, sweetened condensed milk, corn syrup and salt. Bring to a boil, stirring constantly. Heat to between 234 and 240 degrees F (112 to 116 degrees C), or until a small amount of syrup dropped into cold water forms a soft ball that flattens when removed from the water and placed on a flat surface. Cook for 2 minutes at that temperature. Remove from the heat and stir in vanilla.

When the caramel is ready, pour on top of the rice crispys. Allow to cool completely at room temperature.

Over a double broiler, melt the chocolate chips and shortening stirring constantly. When the caramel has cooled. Cut into desired sized bars. Move the bars to a cooling rack with something underneath to catch the chocolate (baking sheet, parchment paper etc...). Pour the melted chocolate over the caramel side first. Transfer to fridge for 10 minutes to cool. When chocolate has hardened, remove bars from fridge. Flip each bar over carefully. Cover the peanut butter treat side with the melted chocolate and move to fridge to cool again until chocolate has completely hardened on both sides. Enjoy! :)
Share/Bookmark
Related Posts Plugin for WordPress, Blogger...