Showing posts with label sides. Show all posts

Wednesday, June 27, 2012

German Style Potato Salad

I love the neighborhood I live in....

The streets are made of brick and are incredibly uneven. The houses were built a hundred years ago and look like cottages that were plucked straight out of Germany and dropped into Columbus, Ohio.

Each house looks like it has its own fascinating story as the steel gates are rusted and the gardens are extravagant. You can usually poke your neighbors house just by sticking your hand out the window.

I love it.
It's not for everybody but I appreciate it. Growing up with strong German roots, German Village feels like home to me. I appreciate the shabby aspect of this neighborhood. I love the idea of walking into a cottage with wood floors, brick walls and claw foot bathtubs and calling it home.

I'm a little creepy in that when I go for runs around the neighborhood and see a new house for sale, I do an about turn and run home to Google the house just so I can take a peek on what the inside beholds.

My grandma always makes this German Potato salad that I crave at least weekly. When I Google "German Potato Salad" in the hopes of finding something similar to hers, nothing seems to compare...

But I always see recipes similar to this. I played around with it and decided it HAD to have sauerkraut. It's a must.

German Style Potato Salad
Dame Good

Ingredients:

4 potatoes
4 slices of bacon, cooked and chopped (I like to bake my bacon :))
1 tablespoon all-purpose flour
1 tablespoons white sugar
1/3 cup water
1/4 cup white wine vinegar
1 clove garlic, minced
8 ounces sauerkraut
1/2 cup chopped green onions
1/4 teaspoon onion powder
salt and pepper to taste

Directions

Bring a large pot of salted water to a boil. Add potatoes; cook until tender but still firm, about 15 minutes. Drain, cool and chop.

Add the olive oil, flour, sugar, water and vinegar to skillet and cook over medium heat until dressing is thick.

Add bacon, potatoes, sauerkraut and green onions to skillet and stir until coated. Cook until heated and season with salt and pepper. Serve warm.

Sunday, April 1, 2012

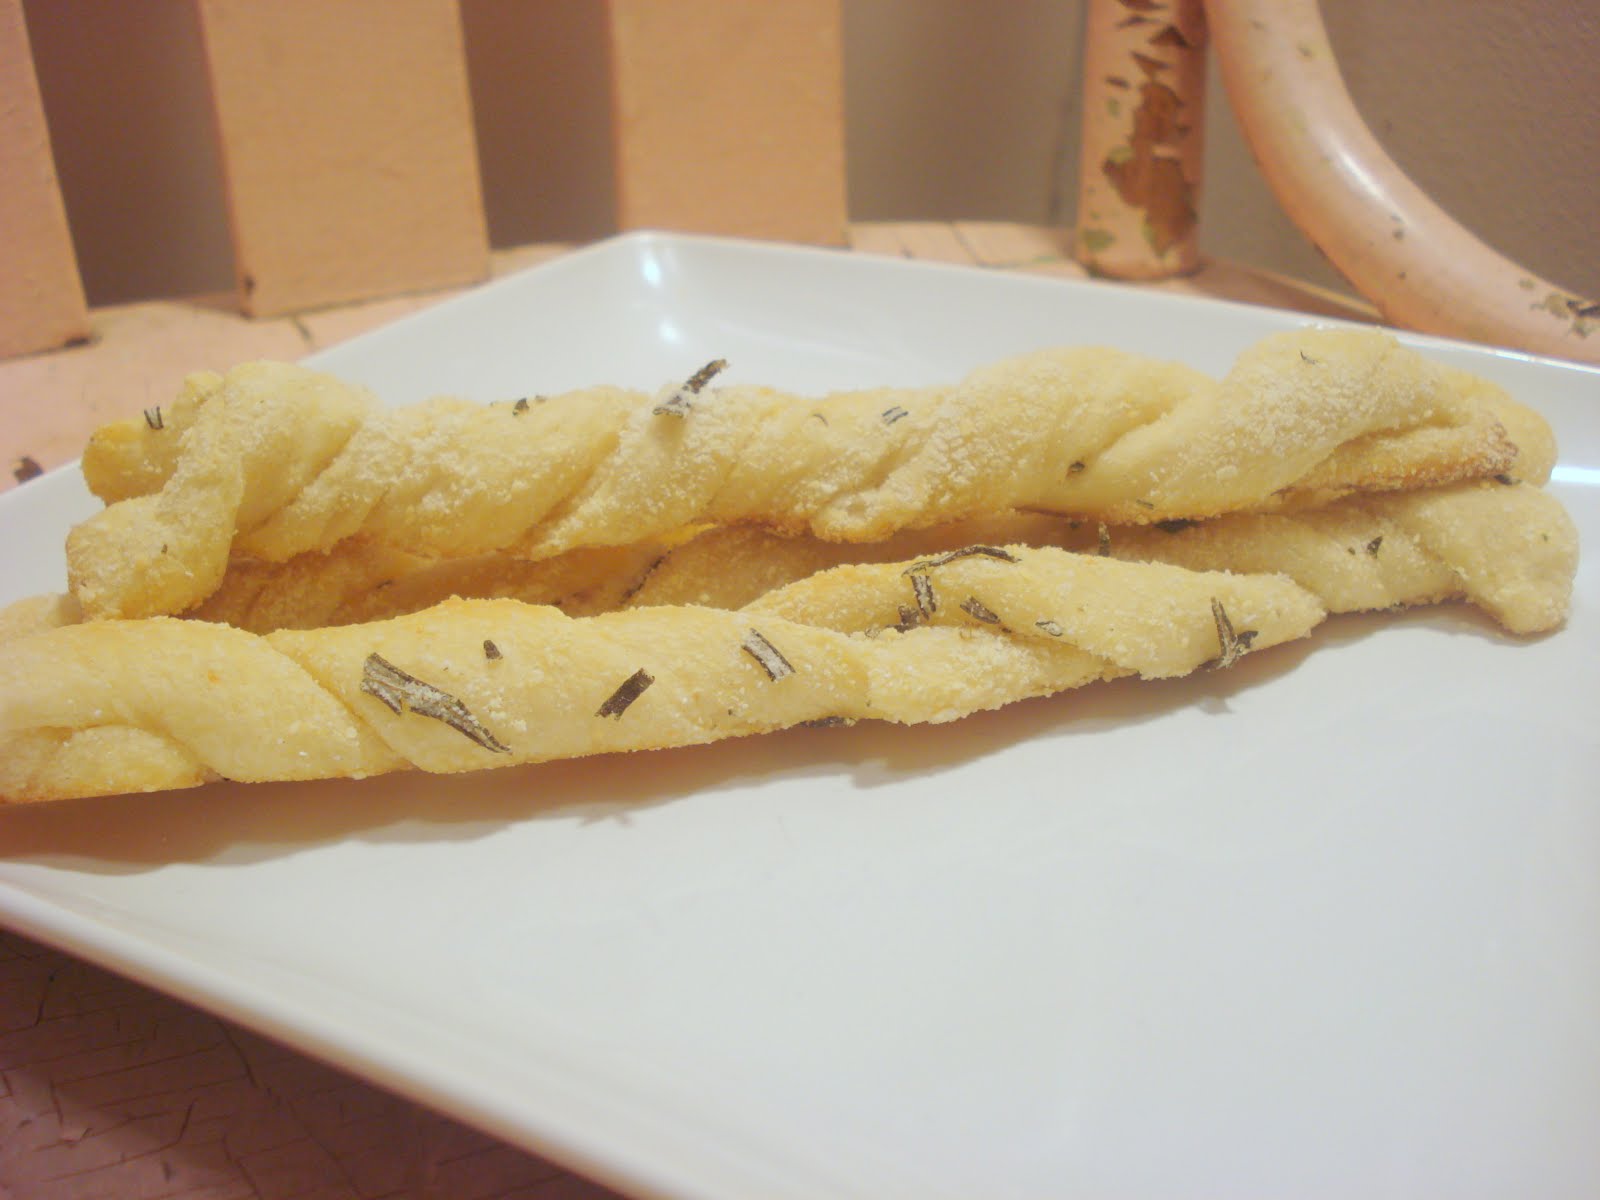
Cheese and Rosemary Breadsticks


I wish I could make a living off of food blogging.

I'm just saying...how nice would it be to cook and eat all day and then write about it? I would never have to get out of my pajamas.

That sounds good to me! Though being a "professional food blogger" would probably mean that I would need a really expensive legit camera (does an iPhone count?!), and know what I'm doing with it. I would also probably need some formal culinary training...or some English/writing education or something.

Hobby it is!


I am nearing(ish) the end of my 6th and final year of college and therefore my brain has been spinning with the "what-ifs" and trying to visualize where I am going to be upon graduation.

Kinda weird.

Carbs. Carbs fix that right?


That was the only transition I had :) These breadsticks rock. They look all fancy and time consuming but they are sim.ple. You could easily trick people into thinking you slaved over these babies (April fools!).

That man and I made these to go with our romantic Italian Valentines day dinner. We loved them.

My only complaint would be that the best way to reheat them the next day is in the oven. And we all know I'm not patient enough to wait that long.


Cheese and Rosemary Breadsticks
From Foodnetwork.com

Ingredients:

1/4 cup grated Parmesan
1/3 cup grated Gruyere
1 teaspoon chopped fresh rosemary leaves
1 (11-ounce) container refrigerated breadstick dough (recommended: Pillsbury)
Finely ground sea salt, optional

Directions:

Preheat the oven to 350 degrees F.

Line 2 heavy large baking sheets with silicone baking sheets or parchment paper. In a food processor, chop the Parmesan, Gruyere and rosemary together until coarsely chopped. Set the cheese mixture aside. Separate the dough strips. Using a pizza cutter or a large sharp knife, cut each dough strip in half lengthwise to form thin strips. Working with dough strip at a time, coat each strip with the cheese mixture, pressing very gently. Twist each cheese covered dough strip and place onto prepared baking sheets. Sprinkle with the salt, if you wish.

Bake until the breadsticks are golden brown, about 10 to 15 minutes. Transfer the warm breadsticks to a basket and serve.

*Instagram pictures anyone?*

One of my dream homes :)

Pumpkin patch!=LOVE

A jellyfish that man of mine and I admired at the aquarium in the Mall of America

Wednesday, March 28, 2012

Tomato, Mozzarella and Arugula Towers


Sometimes the simplest things in life are the sweetest.

Like sleeping in an hour. Or being able to roll your window down while driving. Like when that man of mine does my dishes.

I have a million examples. I can't say that I have always been this way but I have learned to appreciate the simple things; the things that your average person may take for granted.


This dish is a great example of that. It's so simple that it seems almost boring...until you take a bite that is.


That man of mine and I started our very simple and sweet Valentine's Day dinner together with this salad. He was surprised to like it as much as he did and I was surprised that it had as much flavor as it did.

I highly recommend this for someone looking to steer away from their standard everyday salad. It's even better when it is the "opening act" of an Italian dinner.


Tomato, Mozzarella and Arugula Towers
From Skinnytaste.com

Ingredients:

1/4 cup chopped fresh basil
1 tbsp balsamic vinegar
2 tbsp olive oil
kosher salt and fresh pepper to taste
2 medium ripe tomatoes
3 oz part skim mozzarella, sliced into 6 slices
2 cups arugula

Directions:

In a small blender, combine basil, olive oil, balsamic, a pinch of salt and fresh cracked pepper. Blend until smooth.

Slice the the top and bottom off of the tomato, discard. Cut the tomato into 3 equal slices and season with a pinch of salt keeping the tomato intact to assemble the same way it was cut.

Place 3/4 cup of arugula on each plate. Create two towers by layering the tomato, mozzarella, arugula, until two towers have formed, one on each plate. Top tomatoes with the remaining arugula then top with fresh cracked pepper and drizzle with oil and vinegar.

Monday, March 19, 2012

Ham and Cheese Dip


I have a new obsession.

Instagram.

I know.

That man of mine teases me about my new compulsion to take pictures of any and everything. This was definitely the case on St. Patrick's Day.

What can I say? Beautiful weather makes me crazy happy.


I hope everyone else had a good holiday weekend as well!

I love when a recipe I create actually works out.

I'll admit it. This is not always the case.


In fact, last week I concocted what seemed to be a very promising peanut butter granola. Wrong! I burnt it so bad that it was beyond salvageable. Fail.

I discovered my love of food and creating it when I was around 5 and I was taking everything out of my mom's pantry and throwing it into a giant pot of boiling water and calling it soup.

Since that time I have had many fails, and some pleasant surprises. This dip concoction is one that is now a staple for me. Anytime I go to a potluck or some kind of holiday party, this is one of the ones I always like to whip up.


It's a crowd-pleaser and it's simple to whip together. It's my favorite around Christmastime...maybe because of it's festive colors :)


Ham and Cheese Dip
Dame Good

Ingredients:

16 ounces neufchatel cream cheese, softened
1 cup fat-free sour cream
9 oz lean thin-sliced ham, shredded
1 cup reduced-fat sharp cheddar cheese, shredded
3/4 cup green onions, chopped
1 oz dry ranch seasoning
salt and pepper to taste

Directions:

Stir together the cream cheese, sour cream and ranch seasoning. Add the rest of the ingredients and stir until combined. Salt and pepper to taste.

Serve chilled. (I prefer this dip with ritz crackers the best! :))

Wednesday, February 29, 2012

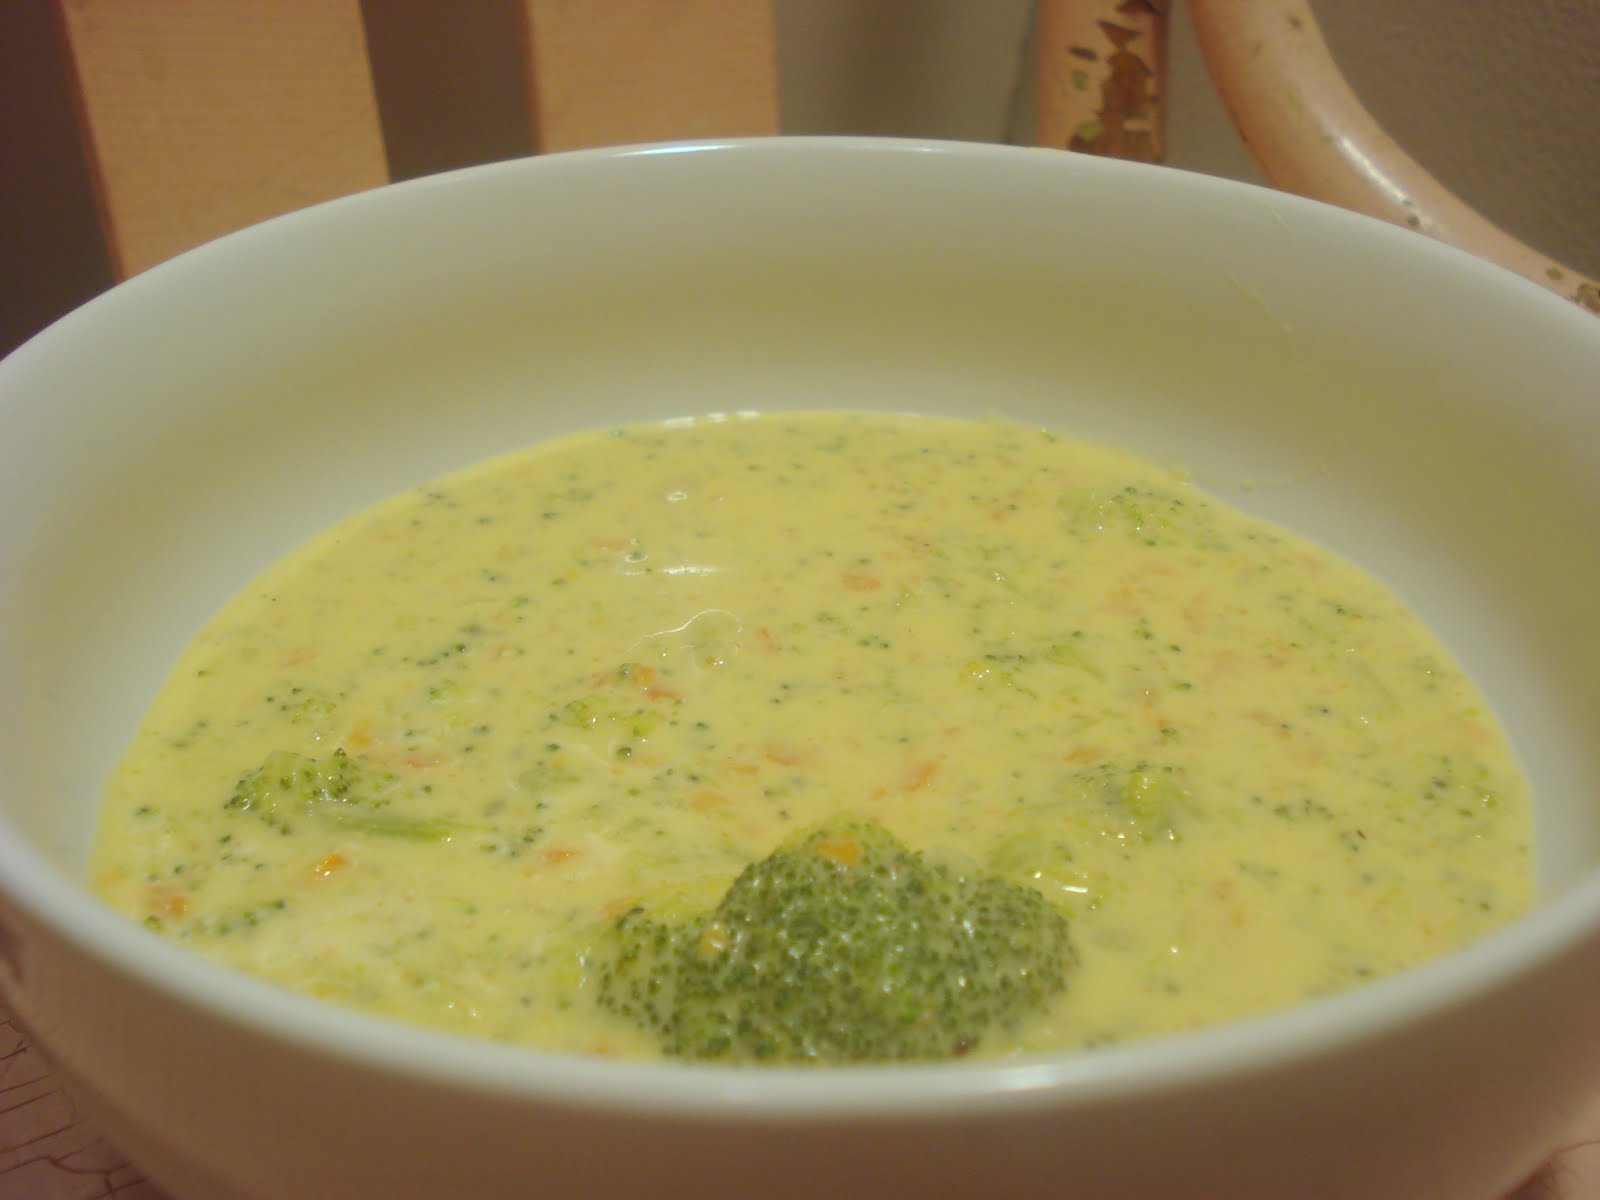
Lightened Broccoli and Cheddar Soup


I am no longer living in the "technological stone ages"!

Well, in terms of cell phones that is...my laptop is still ancient and my digital camera is a joke and my iPod is from 2005 but my phone...my phone is shiny and new.

I finally conformed and got an iPhone.

Yeah, I love it.

I can't stop playing with it.


Now I want a spankin' new lap top, a iPad, a iPod touch, a nice Panasonic Lumix zs7 digital camera (great for food photography I hear), and a Kindle Fire.

But that ain't happening.

This chick is poor. And spends all her money on food.

And shoes.

Mmm food and shoes :)


I think it is now required of me that I immediately go to Panera Bread and plop myself next to the fireplace and act all technologically savvy.

Not sure I could pull that off but speaking of Panera...please tell me I am not the only one obsessed with their broccoli and cheddar soup in a bread bowl...

Didn't think so. I love it. LOVE it. But have a hard time putting out of my mind the fact that it is cheese and cream and carb overload (not a hard enough time not to eat it (psh!) but enough to push me extra hard at the gym).

I decided to find a copycat recipe and lighten it some.

Is it identical? No. Is it a quick fix for a Panera craving? Yeah, I think so. Worth a shot!


Lightened Broccoli and Cheddar Soup
Adapted from CDkitchen.com


Ingredients:

1 tablespoon light butter spread (I use I Can't Believe it's Not Butter Light), melted
1/2 medium onion, chopped
1/4 cup melted light butter spread (I use I Can't Believe it's Not Butter Light)
1/4 cup flour
1 cup half-and-half
1 cup skim milk
2 cups reduced-sodium chicken stock or bouillon
1/2 pound fresh broccoli
1 cup carrots, julienned
salt and pepper, to taste
1/4 teaspoon nutmeg
8 ounces grated reduced-fat sharp cheddar cheese

Directions:

Saute onion in butter. Set aside. Cook melted butter and flour using a whisk over medium heat for 3-5 minutes. Stir constantly and slowly add the half-and-half and skim milk(this is called making a roux). Add the chicken stock whisking all the time. Simmer for 20 minutes.

Add the broccoli, carrots and onions. Cook over low heat until the veggies are tender for 20-25 minutes. Add salt and pepper. The soup should be thickened by now. Pour in batches into blender and puree. Return to pot over low heat and add the grated cheese; stir until well blended. Stir in the nutmeg and serve.

Serve with wheat bread roll.

Tuesday, December 6, 2011

Roasted Thyme Sweet Potatoes


My eyes still burn from chopping onions...2 hours ago. I want to close them but it seems to make them burn more.

How can this happen to someone who loves onions as much as I do?!

Blasphemy I tell you.

The onions have nothing to do with this post actually. I am just straining to keep my focus on the computer screen when I just want to cry. I made slimmed up a version of Panera Bread's broccoli soup for dinner tonight. Stay tuned my friends.


Now this post...is the side I made for the apple cider glazed chicken I made a couple weeks back. The pairing is magical I tell you.

You may be wondering why my sweet potatoes are not orange (or whatever color that is)...well apparently white ones exist. Ch'yeah, who knew?

On, and they're tasty. If your store happens to have 'em...snatch them up.


Roasted Thyme Sweet Potatoes
From Epicurious.com

Ingredients:

4 medium sweet potatoes, peeled and cut into 1 1/2-inch-thick rounds
3 tablespoons olive oil
4 large garlic cloves, minced
1/3 cup fresh thyme leaves, plus 6 thyme sprigs for garnish
1/2 teaspoon kosher salt
1/2 teaspoon red pepper flakes

Directions:

Preheat oven to 450°F. In large mixing bowl, combine all ingredients and toss. Arrange potato slices in single layer on heavyweight rimmed baking sheet or in 13x9-inch baking dish. Place on top rack of oven and roast until tender and slightly browned, about 40 minutes. Serve warm or at room temperature, garnished with thyme sprigs.

Tuesday, August 16, 2011

Peach BBQ Baked Beans


I have been a horrible blogger.

I know. I am sorry.


If it is any consolation I have had a really really tough and challenging week. Sometimes things happen to challenge you or to drastically shift your perspective so you can see things clearly and learn about yourself.

I have been learning about myself.

It has been tough. And things aren't ideal right now but I am putting the confident and positive Tarrah I used to know so well back on and never taking her off again.

Things get tough for a reason. If you belive in your gut, then you just have to believe things will work out the way they should.

Positive. Positive. Positive.

A few weeks back, we had a work potluck. Gosh I love potlucks. It was a backyard barbeque kind of theme...Gosh I love barbeques :)

I have had this recipe tucked away in my "to-do" list for what feels like ages. I have always been dying to make it but never had the ample opportunity until now.

Love it. Love love love it!

It makes a TON...and by a ton I mean you will be putting containers of it in the freezer. But that's okay because its so yummy and come winter time when you are really missing that beautiful summer that feels like so long ago and would give anything for a backyard barbeque you can pull this out.

You'll feel better. I promise.

Ps, I am leaving for a much needed little mini-vacation with a few friends tomorrow night so I will be MIA for a bit, but for happier reasons :)I am so ready to be on a boat with good friends, margaritas, junk food and no sense of time...yes please!

I shall return refreshed and revived!


Peach BBQ Baked Beans
From foodnetwork.com

Ingredients:

8 strips bacon, cut into 1-inch pieces
1 red bell pepper, seeded and chopped
1 large yellow onion, chopped
1 (#10 can, about 6 pounds and 10 ounces) baked beans (recommended: Bush's)
3 cups canned peach pie filling
1/2 cup barbecue sauce
2 tablespoons Jack's Old South BBQ Rub

Jack's Old South BBQ Rub:
1/4 cup brown sugar
1/4 cup sweet paprika
1/4 cup kosher salt
3 tablespoons black pepper
2 teaspoons garlic powder
2 teaspoons onion powder
1 teaspoon cayenne pepper
1 teaspoon dried basil

Directions:

Preheat the oven to 325 degrees F.

Heat a large skillet over medium heat. Add the bacon and cook, stirring, until somewhat crispy and its fat has rendered. Using a slotted spoon, transfer the bacon to a paper towel-lined plate to drain, leaving the fat in the skillet.

Add the pepper and onion to the skillet and cook, stirring, until softened, about 6 minutes. Transfer the mixture to a large baking pan.

Add the bacon, beans, pie filling, barbecue sauce, and rub to the pan. Mix to combine and bake, uncovered, until hot and bubbly, about 1 hour.

Tuesday, July 12, 2011

Lighter Garlic Mashed Potatoes


Last weekend was my cousin's wedding reception. Most of the family was there and we had a blast...

My family doesn't get together too often but when we do...it gets rather crazy. Like, my family is the kinda crazy that if they had a tv show, people watching would think it's scripted...because there is no way people can be like that...

Way!

You can't make this stuff up people. Though they are some crazy folk, I love them. Between the "Rocky Top" the "Chicken Dance" and them even pulling out "Wild Thing" (which apparently I had stripped down into my diaper dancing to that song at the tender age of 2 (under the influence of my grandpa))

Yes, they are the people who have corrupted me.

And I wouldn't change them for anything.

Oh, and the food? Sooo good! Wedding food can be so hit or miss...but this was a "hit". They had super tender roast beef, chicken cordon bleu, green beans and creamy mashed potatoes.

These mashed potatoes rocked...but I could feel them cling to the thighs the minute they touched my mouth (don't worry I danced it off)...but special occasions call for fatter thighs.

If you are terrified of mashed potatoes because of the carbs (GASP!) and the butter (DOUBLE GASP!) then have no fear my friends...I have found a pretty darn good alternative.

I found this recipe and tweaked it a bit...and let me just say, these don't taste too healthy....and they pair perfectly with my lighter salisbury steaks...add some corn and you have a tv dinner with flavor and minus the burnt brownie with paper-like sprinkles.

Lighter Mashed Potatoes
Adapted from Foodnetwork.com

Ingredients:

1 1/4 pounds Yukon gold potatoes, unpeeled and cut into 1-inch pieces
4 large cloves garlic, peeled and quartered
1/2 cup low-sodium chicken broth
1 tablespoon olive oil
1 teaspoon sea salt
1 teaspoon freshly ground black pepper
1/2 cup fat-free sour cream
1/2 teaspoon onion powder

Directions:

Place the potatoes and garlic in a steamer basket fitted over a large pot of boiling water. Cover and steam until the potatoes are knife-tender, 12 to 15 minutes. Warm the chicken broth in a small pot on the stove or in a glass container in the microwave.


Remove the steamer basket and drain the water from the large pot. Transfer the potatoes and garlic to the pot, add the oil, salt, pepper,onion powder, sour cream and broth and mash until smooth.

Sunday, June 19, 2011

Herbed Cheesy Polenta


It's official...I have the worst luck with technology. I actually think I repel properly functioning technology.

Earlier this week actually, my touchscreen phone stopped responding to touch. There were dead spots all over and it was causing me intense grief. It actually decided just for the hell of it to delete all of my contacts...great! I decided to order a new digitizer and install it myself. You can probably assume where this is gong to go...

Much to my surprise my new screen arrived 2 days later...alas! I can access the outside world! I was a nervous wreck when I was taking apart my phone but I somehow managed. I removed the crappy screen and when I had just attached my new screen with super glue....but when I tried to remove my hand, it was stuck...

Are you kidding me?!

I had managed to get super glue all over the brand new shiny screen. The screen still worked but the glue bothered me so much that I tried to clean it and scrape it off. While scraping (I am so dumb) I scratched the screen. This caused it not to work at all...in fact it was even worse than the first screen...

I was again forced to order yet another screen. Thankfully this one came again very quickly. I was a nervous wreck installing this one, trying to be super careful and slow with the super glue. I held my breath the entire time and was able to breath a sigh of relief when I removed my hands to find them and my screen glue-free!

YES!

I was screwing in the very last of the screws into the back of my phone when I heard a crack. "Oh no no no no no!" I flip my phone over and find that my LCD screen has cracked down the middle.

I give...

The only fix I have now is a glass of wine and dark chocolate.

In other news it is Father's day! My dad is hundreds of miles away and I miss him dearly. I know we will make up for the missed holiday over food and beer the next time I see him, so I have that to look forward to. I miss you and your mullet and even your fanny pack dad! :)

Herbed Cheesy Polenta
From foodnetwork.com

Ingredients:

6 cups water
2 teaspoons salt
1 3/4 cups yellow cornmeal
3/4 cup grated Parmesan
3/4 cup whole milk
6 tablespoons (3/4 stick) unsalted butter
3 tablespoons chopped fresh Italian parsley leaves
2 teaspoons finely chopped fresh rosemary leaves
2 teaspoons chopped fresh thyme leaves
1/2 teaspoon freshly ground black pepper

Directions

Bring the water to a boil in a heavy large saucepan. Add 2 teaspoons of salt. Gradually whisk in the cornmeal. Reduce the heat to low and cook until the mixture thickens and the cornmeal is tender, stirring often, about 15 minutes. Remove from the heat. Add the cheese, milk, butter, parsley, rosemary, thyme, and pepper, and stir until the butter and cheese melt. Transfer the polenta to a bowl and serve.

Share/Bookmark

Monday, March 21, 2011

Wild Rice Salad


I am so excited that it is officially Spring now! Yesterday, being that it was the first day of Spring, I was all smiles all day. Spring actually gets me motivated. I want to get off the couch and go work out and take Kirby on walks and clean...a lot...

It's super weird that I enjoy cleaning...I realize this...I am such a rare individual.

Anyways, this wild rice salad is one of the side dishes Shawn and I made for our Valentines day dinner along with the grilled salmon. We were kind of weary about pairing these but they went really well together...

Shawn ate half of the bowl before it even made it to our plates...

Yep, we're both kind of fat.

This salad can be eaten warm or cold...I don't think it really matters though we ate it cold and found it very satisfying...

Wild Rice Salad
From foodnetwork.com

Ingredients:

2 cups water
1/2 teaspoon salt
1 cup wild rice
1 (6-ounce) jar marinated artichoke hearts, drained and halved, reserve marinade
1 (6-ounce) can green peas
1/3 cup coarsely chopped green bell pepper
3 green onions, chopped, white and green parts
1 cup cherry or grape tomatoes, halved
1/4 cup toasted slivered or sliced almonds, for garnish

Dressing:
1 1/3 cups canola oil
1/2 cup white vinegar
1/4 cup grated Parmesan
1 tablespoon sugar
1 teaspoon salt
1 teaspoon celery seed
1/2 teaspoon ground white pepper
1/2 teaspoon dry mustard
1/4 teaspoon paprika
1 clove garlic, minced

Directions:

In a 1-quart pot with a lid, bring 2 cups water and the salt to a boil. Add the rice and stir well. Reduce the heat to low, cover, and simmer for 45 minutes to 1 hour. Drain excess liquid from the rice.

Meanwhile, combine all the dressing ingredients in a jar with a tight-fitting lid and shake well. Refrigerate until ready to use.

In a large bowl, combine the rice, artichoke hearts, peas, green pepper, green onions, tomatoes, reserved marinade, and half of the dressing. Toss well. Cover and chill or eat at room temperature. Just before serving, toss again and taste. Add some of the remaining dressing, if desired. Sprinkle with the almonds and serve.

Share/Bookmark

Wednesday, January 26, 2011

Sauteed Potatoes and Chorizo


This is a dish I made a while back for a potluck we had for the bakery. It was a "Merry Margarita Christmas" kinda thing. It was nice...we had lots of mexican food and strong margaritas. Mexican is my favorite so picking something to make was torturous. I kind of randomly selected these potatoes with chorizo because of the rave reviews on the Food Network.

Now this was good but I think I made a mistake. I think that perhaps I boiled the potatoes just a tad too long because they ended up more on the mushy side. It was still good, don't get me wrong but my heart was set on a crispy potato. My advice would be to boil the potatoes until just barely tender...maybe about 8 minutes.

The origional recipe did not have any peppers or anything, I just added some peppers for fun and color...this would be tasty even without.

Sauteed Potatoes and Chorizo
Adapted from Foodnetwork.com

Ingredients:

1 tablespoon canola or olive oil
10 ounces Mexican pork chorizo, casings removed
1 small onion, diced
1 poblano pepper, seeded and ribs removed, diced
1 red pepper, seeded and ribs removed, diced
1 jalepeno pepper, seeded and ribs removed, diced
1 pound red skinned new potatoes, cut into small (1/4-inch) dice, and boiled (about 6-8 minutes)
Kosher salt and fresh ground black pepper

Directions:

Heat the oil in a heavy large skillet over medium-high heat. Add the chorizo and cook, breaking up the clumps, until dry and crisp, about 10 minutes. Using a slotted spoon, transfer the chorizo to a paper lined plate to absorb any additional oil. Pour off all but 1 tablespoon of fat from the pan and heat the pan over medium-high heat. Add the onions, peppers and boiled potatoes and saute until brown, about 12 minutes. Stir in the cooked chorizo and season with just a little salt and pepper, to taste. Transfer to a serving bowl and serve.
Share/Bookmark
Related Posts Plugin for WordPress, Blogger...